Precision Agronomist Phil Long highlights three key windows for feeding corn plants as well as some other factors to consider as corn growth and development progresses this season.
-
Latham Hi‑Tech Seeds
#AskTheAgronomist: Optimal Timing for Side-Dressing Nitrogen

-
Latham Hi‑Tech Seeds
#AskTheAgronomist: Evaluating Frost Damage in Corn and Soybeans
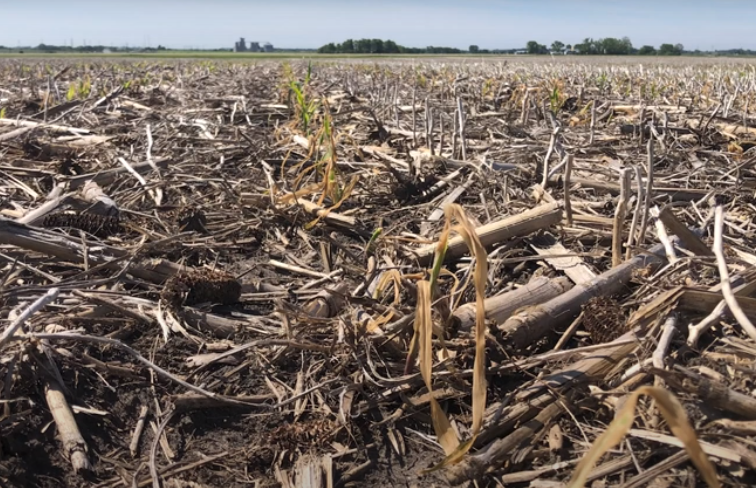
Parts of the upper Midwest experienced below-freezing temperatures during the last few days of May. In this week’s #AskTheAgronomist, Latham Precision Agronomist Phil Long covers how to evaluate frost damage in corn and soybeans.
-
Latham Hi‑Tech Seeds
#AskTheAgronomist: Early Season Soybean Scouting and Stand Counts

-
Latham Hi‑Tech Seeds
Tips for Scissor Cutting Alfalfa
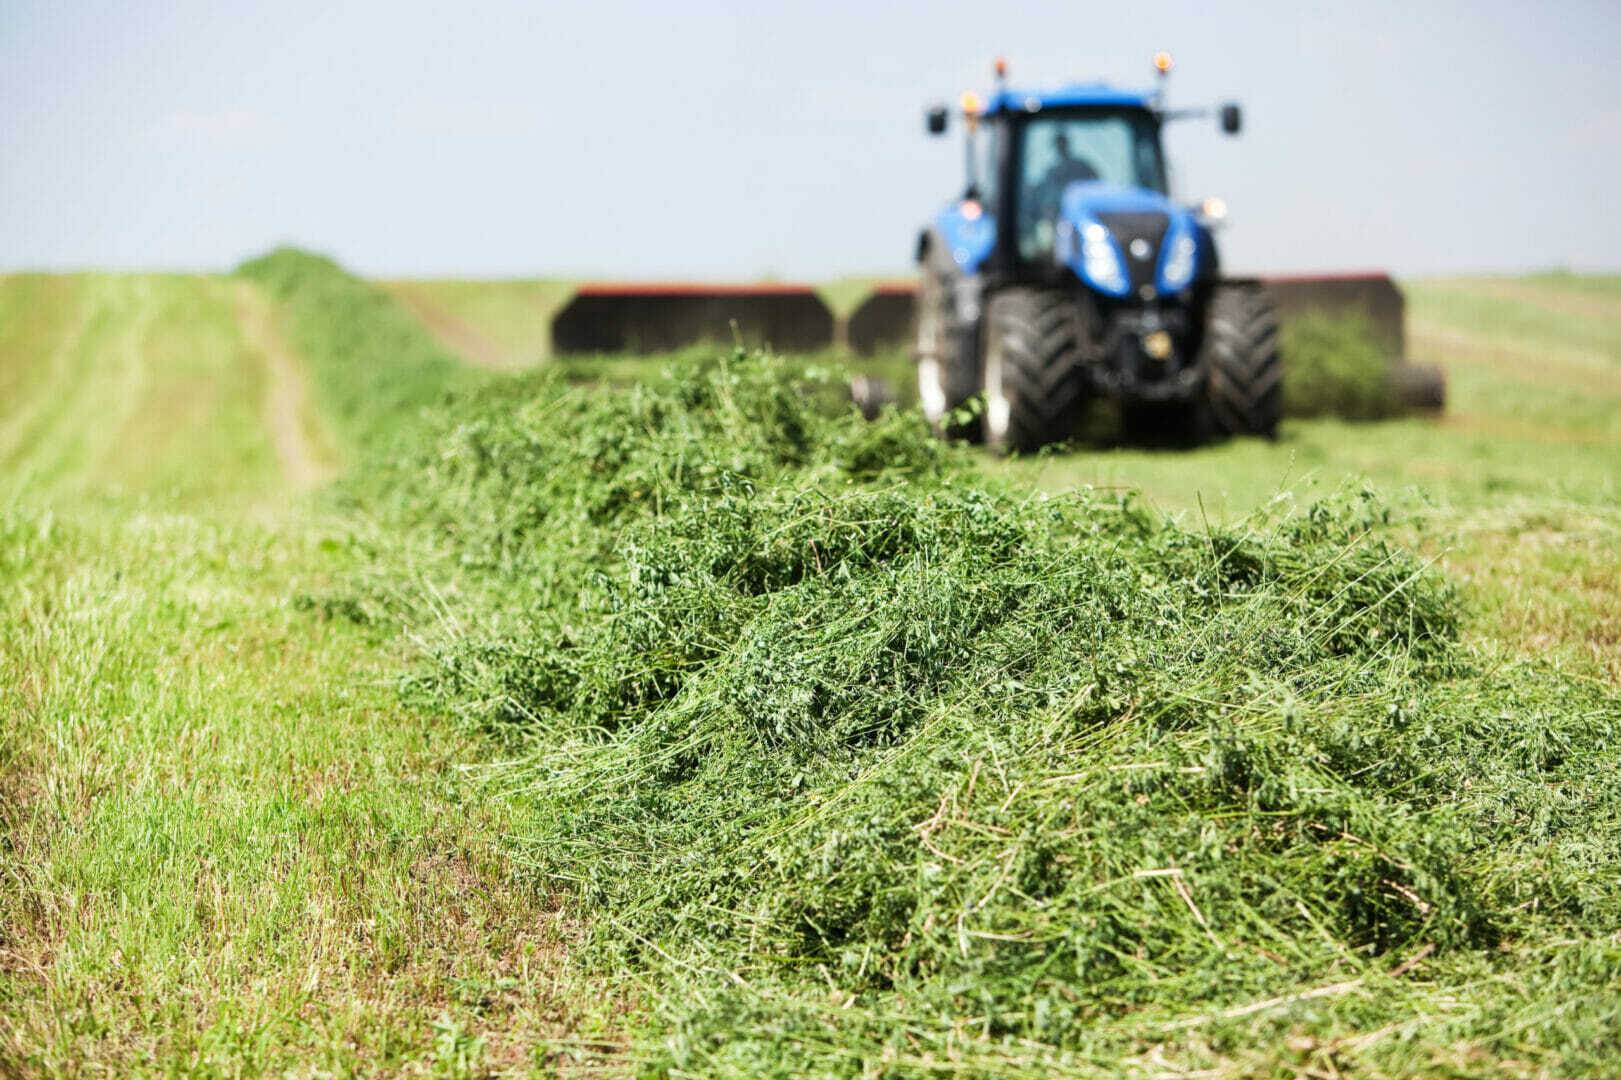
From weather patterns to other fieldwork to insect infestations, many factors can impact when you decide to harvest alfalfa. But if your goal is to harvest based on feed quality, understanding alfalfa’s Relative Feed Value (RFV) is key.
You can measure RFV by taking regular field clippings and analyzing samples. This sampling method is known as “scissor cutting” and it can help you determine the best time to start harvesting alfalfa. It is important to stay consistent and ensure samples are representative of your fields.
Here are six steps to follow when scissor cutting alfalfa:
- Start sampling in mid-May; or when alfalfa is about 14-inches tall.
- Sample on Mondays and Thursdays so lab results are available on business days. You don’t want to let the crop sit over the weekend while waiting for results!
- Stay consistent with the time of day; before 8 a.m. is preferred. This helps reduce day-to-day variability.
- Sample two, 2-square-foot areas that are representative of the field. Then choose 5-6 different plants in each area. Be sure the selected plants are random, not just the largest.
- Cut 2-3 inches above the soil and collect about a half-pound of fresh weight per location.
- Place samples in a paper bag and send to a forage quality testing laboratory. Dairyland Laboratories is a good testing resource in the Midwest.
We recommend cutting alfalfa when RFV hits 170 to get RFV of 150. It will lose about 15-20 RFV points during harvest or about 4-5 RFV points per day depending on the weather.
The PEAQ system is a good tool for estimating RFV in conventional alfalfa without having to use a lab. The method is based on measuring the tallest and most mature stem in a 2-square-foot sample area, then using this table to find an average RFV. If you are using reduced lignin products, the PEAQ measuring method may not be as accurate.
-
Latham Hi‑Tech Seeds
#AskTheAgronomist: What’s Our Next Move?

-
Latham Hi‑Tech Seeds
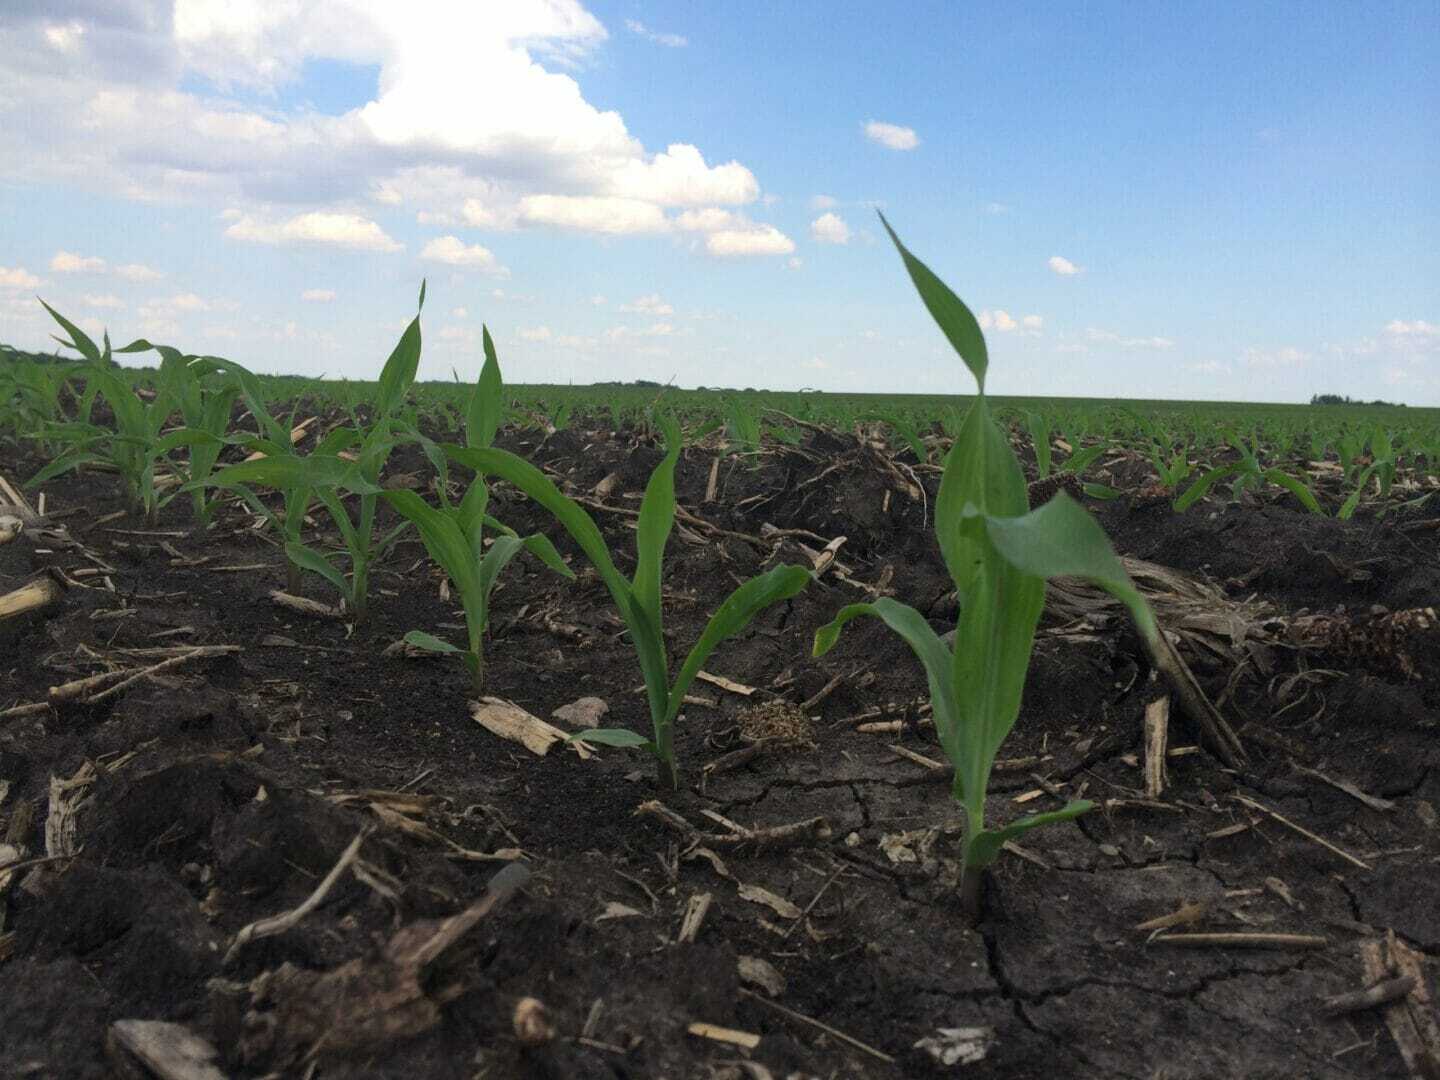
#AskTheAgronomist: Uneven Corn Emergence
-
Latham Hi‑Tech Seeds
Execute Your Plan for Seeding Success

Vince Lombardi had many attributes that built his winning record, but I suspect it started with a vision of reaching the end zone. He then built and executed a plan. He kept it simple, often using the same play many times in a row. The power sweep was successful because the focus was on executing it flawlessly.
The same steps can be applied in your pursuit of leaving no yield in the field. Keep the vision clear. Build the plan. Master the basics, and you’ll hit the proverbial end zone of success.
Below are six basic steps to achieve success with alfalfa this growing season:
- Check emergence. Alfalfa is a survival of the fittest plant. Some research suggests 60% of seeds won’t become seedlings. Depending on your seeding rate, seeding bed, and weather, you should see 50 live plants per square foot within four weeks of spring seeding. AlfaShield™ improves survival chances.
- Check existing stands. The crown is fully developed after one full year, so we transition to stem count. Strive for more than 55 stems per square foot. If a field is not looking good and the stand is young enough, you should be able to no-till some supplemental alfalfa seed.
- Control weeds. Be the boss! Mortality rates are often high due to competition from aggressive weeds. Scout early and spray when label advises. The younger the weeds, the more vulnerable they are to herbicides. New seeding can be cut after about 60 days or so, which also can help manage certain weed populations.
- Be vigilant against pests. New seedings are vulnerable to leafhoppers, especially when they come from established fields nearby. Temperatures of 70+ degrees Fahrenheit also increase leafhopper reproduction. Eggs hatch in seven to 10 days and become adults in about 14 days. The damage to yield potential is often irreversible, so it’s important to be vigilant.
- Cut it short for best quality. A tremendous amount of research has shown a cutting height of two inches is the most economical and provides the best forage quality (See graphs below.) That is, as long as you don’t have rocks and gopher mounds!
- Feed the plants. Potash equals plant performance. Every dry matter ton of alfalfa removes about 50 to 60 pounds of potassium per acre. Consider adding sulfur, boron and zinc. Testing soil and tissue help you develop the best fertility program. Most growers apply supplemental fertilizer after first cutting and third cutting for best results.
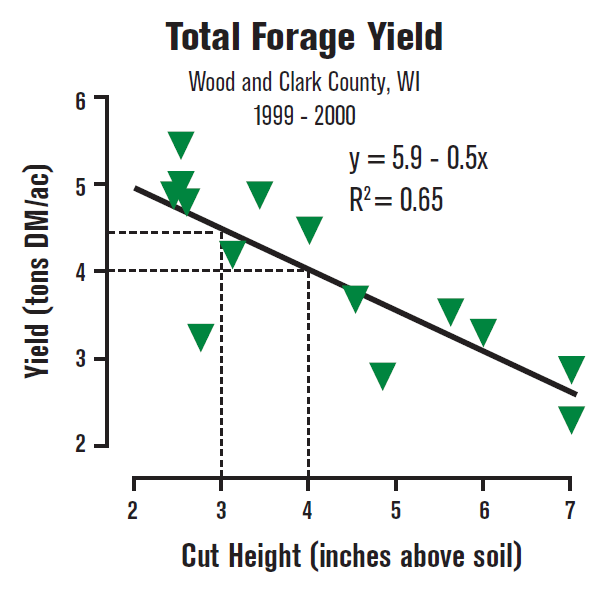
Research on ideal cut height. 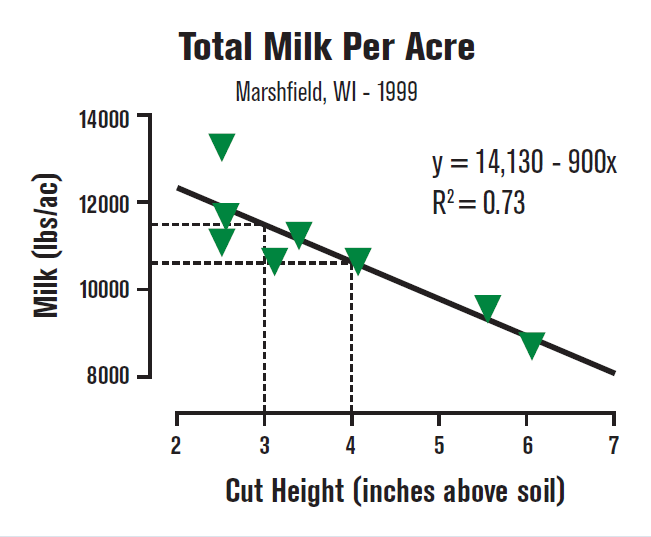
Research on ideal cut height. -
Latham Hi‑Tech Seeds
Scout Early for Below-Ground Insects That Damage Corn
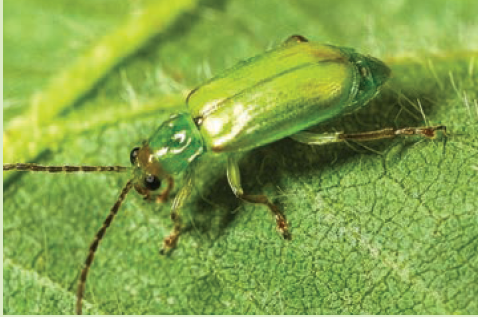
Numerous below-ground insects can damage your corn stand. We will focus on four pests, including where you will likely find them and what management tips could help prevent damage.
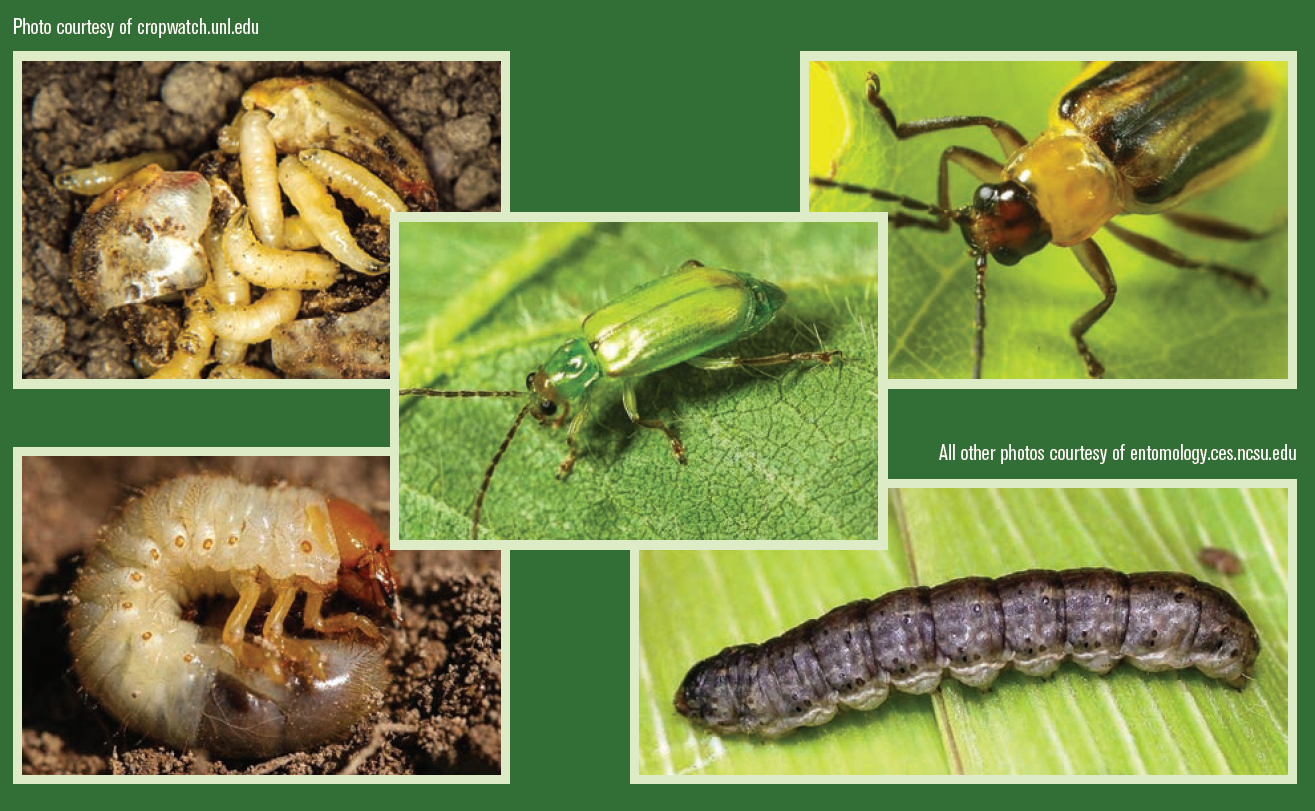
Seedcorn Maggots destroy seeds before germination. This can occur when soils are cold and germination conditions are less than ideal. Most damage occurs in high organic regions of fields, especially areas with heavy manure applications. The best time to scout is from planting to VE. Dig up seed in areas with damage to check for insect feeding. Note problem areas, and consider additional soil-applied insecticides in those areas in the future.
Scout for White Grubs prior to planting. High-risk fields include those that have been in pasture one or two years previously or where willow or cottonwood trees are growing adjacent to the field. Most of Latham’s seed treatments control this insect unless infestations are high enough to overwhelm the seed treatment. In areas with that potential, consider soil-applied insecticides.
Shortly after eggs hatch in May and June, Northern Corn Rootworm and Western Corn Rootworm larvae begin feeding on root hairs and tunnel inside roots. As they develop, larvae begin feeding on larger root tips. Extensive feeding can eliminate entire nodes of roots. In fields with known beetle history, use Latham® hybrids that contain SmartStax® or Agrisure Duracade® technology. In fields with heavy pressure, use a soil-applied insecticide in addition to a traited hybrid.
Black Cutworm most commonly occur in low or poorly drained areas of fields. Latham brand SmartStax hybrids contain the Cry1F Bt protein that can control most problems of cutworm infestations. Our new hybrids for 2022 planting with the Trecepta® and 5222 Duracade traits contain the Vip3A Bt protein that also offers great control.
Your Latham Dealer has the tools you need to effectively control these pests. As you scout fields and find pests, note those areas. Then ask your local seed dealer to help you build a plan that incorporates the Latham hybrids that can offer you the best protection.
-
Latham Hi‑Tech Seeds
Check Those Soybean Stands!
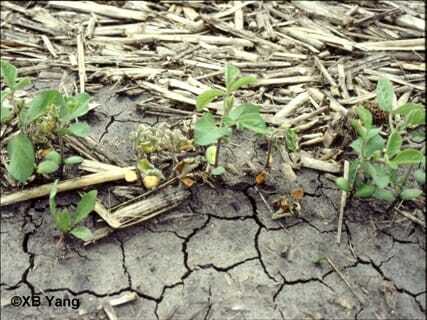
Soybean stands can suffer from a wide variety of problems that will reduce population. Hail, diseases, insects, cold soil temperatures at planting, compaction, and planter failures can all affect the stand individually and in combination.
Stand reductions almost never occur evenly across the field. Here are some basic steps to help evaluate soybean stands and decide if re-planting is necessary.
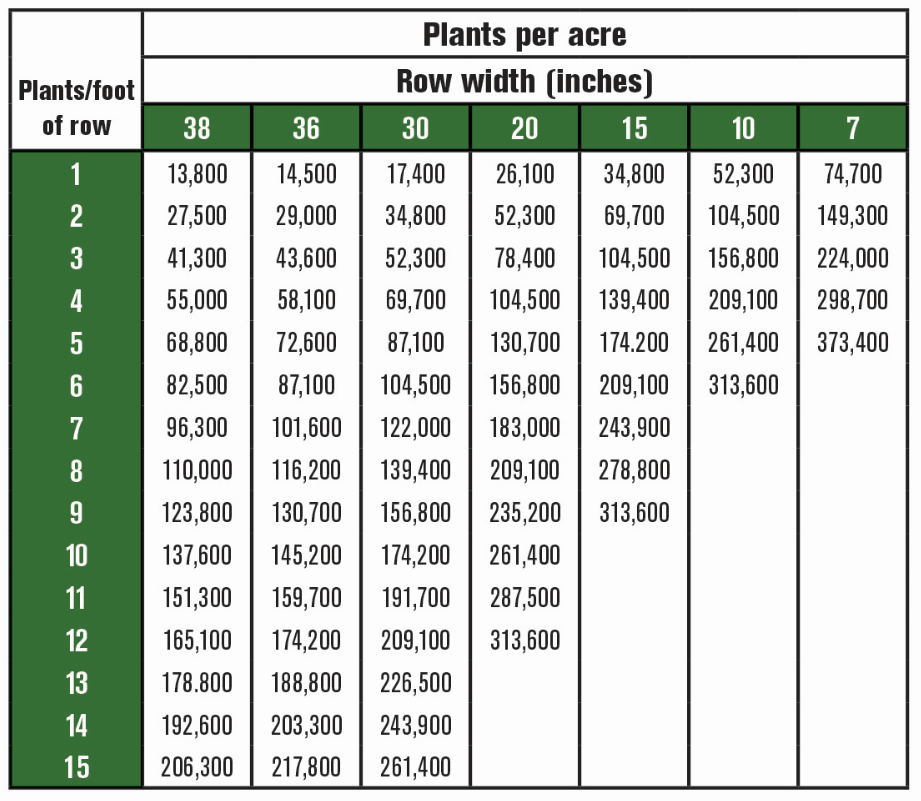
Take 10 stand counts in the area with the worst damage and 10 counts in the part of the field that was not affected or affected just slightly. At each point, measure off 10 feet of row and count the number of live, viable plants. Then calculate the average of your 10 points and compare them to the table below to see how many plants per acre you have remaining.
A stand of 100,000 evenly distributed plants generally gives you optimum yield. As the growing season progresses, however, it is much more difficult to establish a good stand. A stand of 75,000 on May 15 is inadequate, but you might be better off leaving a stand of 75,000 plants if it is July 1.
Planting soybeans on or before June 1 averages 95% of expected yield. In a five-year Latham Seeds’ study, there was no significant yield difference in soybeans planted before May 15. Planting dates included late April, early May and mid-May. We did not see yields drop to 85% or lower until after June 15.
Our results are similar to studies done by university researchers. If you farm below the line from Watertown, SD through the Twin Cities and over toward Green Bay, Wisc., I recommend staying with soybeans in your normal maturity until mid-June. After June 15, consider the precipitation expected in late June and early July because the biggest threat to establishing a late soybean crop is lack of rainfall. If you are north of that line, you may need to switch to an earlier variety a week or so sooner.
-
Latham Hi‑Tech Seeds
Gathering Planting Data Sets You Up for Success All Season Long
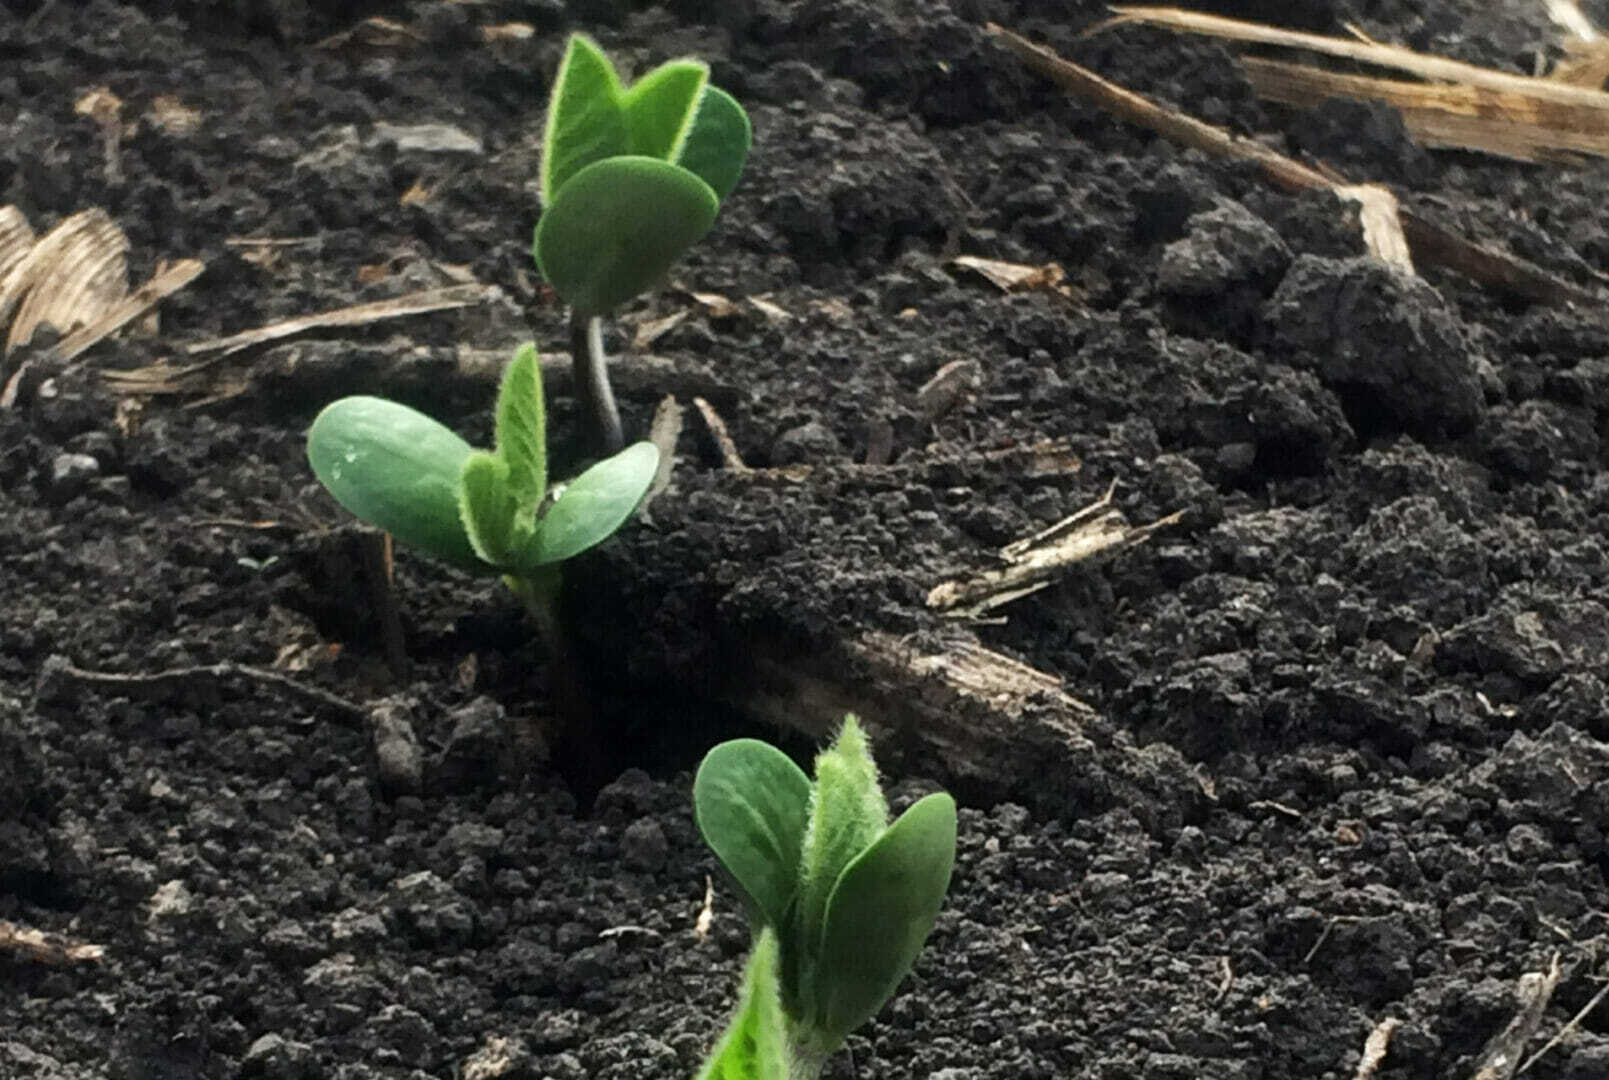
Planting really is the most important operation in terms of seeing your best yield potential. We have tools at our fingertips that can make farming a little easier during the rest of the season.
Use planter maps on-the-go to your advantage. Some of the best maps to watch as you’re planting are the singulation/spacing or downforce maps. Tracking spacing and downforce per row is a huge asset in the cab. Although it doesn’t replace routine checks, it helps you focus on trouble rows or on certain parts of the planter. Load these maps into your iPad, so you can go back to those areas throughout the season and note the impact planter issues or upgrades have.
Maintaining uniform seed depth and spacing is crucial. Uniform emergence can impact yields by up to 8 to 10 percent! Poor spacing creates unequal competition, so little corn plants can account for another 1 to 5 percent of your yield at the end of the season. Track how your planter performs. If you don’t have a monitor, you can still gather this information. Check your seed depth throughout the field. Stop in different soil types or areas where you know there may be some compaction. This will help you monitor the impact of seed depth and spacing throughout the season. Then next year you can plan how to adjust your planter for challenging conditions.
Monitor corn/corn fields for depth but also for seed-to-soil contact. Heavy residue with corn/corn fields can cause seed to be in contact with residue and create delayed emergence. Seeds absorb water much better from soil than from plant residue, so row cleaners and tillage preparation are crucial.
Pinpoint where the issues are. Today’s technology makes it easy to drop a pin where you are, so you can revisit that spot in the field. You can drop a pin on most any planter monitor, your phone, or an app like Data Forward™ that allows you to track your fields all season long. A pin also will let you make a late-season yield estimate or determine how much yield was lost or gained by fixing the specific issue that caused this problem area in your field.
None of us likes to learn the hard way. We certainly don’t want to make the same mistake twice! Take the time this planting season, or as you spray post-emerge herbicides, to make notes that can help you make better planting or management decisions next year.
